Do you want to grow your email marketing list? Before you reach out for the stars, learning how to Create Mailchimp Forms With WPForms and growing your email list is the fastest (and simplest) way to do that.
Mailchimp is one of the best tools for managing and sending emails. It's not hard to get started, either.
Mailchimp is one of the most popular email marketing tools in the world, and for good reason. Want to learn more?
Get my course on Mailchimp now.
Mailchimp has been a staple in many businesses ‘ email marketing strategies for a long time now, and their popularity only continues to grow.
As MailChimp becomes more popular, it can be difficult for WordPress website owners to find out how to add Mailchimp subscribe forms on their websites.
Fortunately, WPForms includes a MailChimp addon in the Plus, Pro, and Elite plan that will help you create a Mailchimp form on your site with ease.
In this blog post, I will show you how to create a Mailchimp subscribe form in WordPress. You'll be able to start building your mailing list with WPForms by following these steps.
- Activate WPForms, Create A Form, & Add Fields
- Configure MailChimp Integration Settings
- Set Up Subscription Confirmation Behavior
- Add The Mailchimp Plugin To Your Website
Step 1: Create MailChimp Forms (& Activate WPForms MailChimp Addon)
You’ll need an active WPForms account with the WPforms WordPress plugin installed on your WordPress instance. Further, the Mailchimp Addon only works on the WPForms Plus, Pro, and Elite plans.
Once you’ve activated your MailChimp Addon inside WPForms, just head over to WPForms form builder and create a new form (WPForms > Add New)
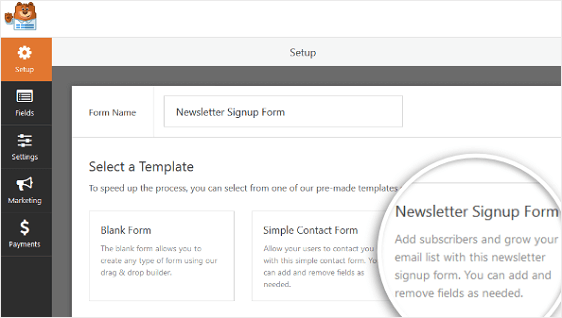
Call the new form what you want (I recommend using a naming convention that’s easy for you to remember).
If you further add several more sign-up forms for MailChimp (say multiple offers or content upgrades), this naming convention will save your life.
Then, create your form by adding the necessary form fields.
Note: The lesser the form fields, the better it is for your form conversion rates

Choose absolute basics for your forms such as First name, email, and GDPR field.
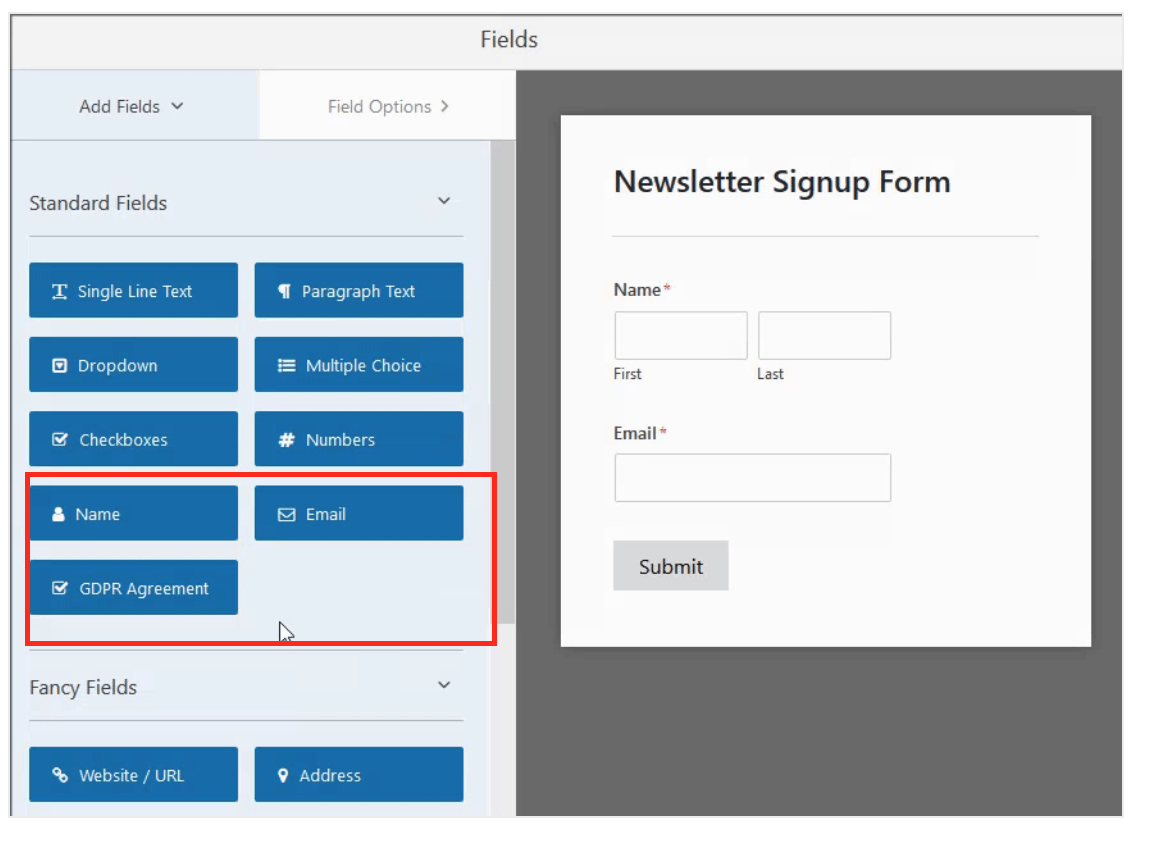
Click save after you are done.
Step 2: Configure MailChimp Integration Settings
Let’s configure the Mailchimp settings to help connect your form with MailChimp. Within your WPForms builder, head to Marketing> Mailchimp
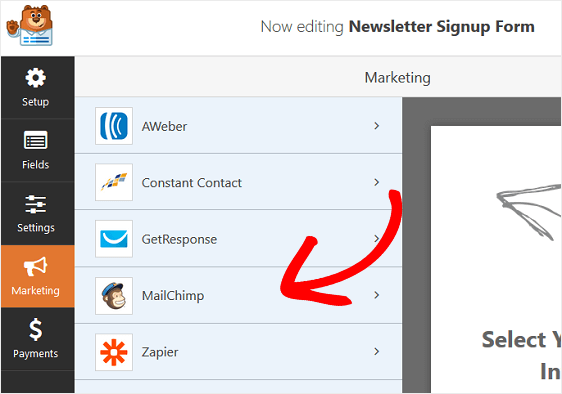
Note: If you are not using MailChimp but some other email service provider such as GetResponse, Convertkit, or Drip, you can connect with those instead as well.
For email marketing services not on the list, you can connect with Zapier or Automate.io and then connect with your service provider too.
A pop-up appears as soon as you connect MailChimp with WPforms and you can name the connect whatever you want (remember to follow a naming convention. You don’t want to see a mess inside).

Next, you’ll need MailChimp API keys to connect. Head over to your MailChimp account, click on Account, and find your API keys as shown.
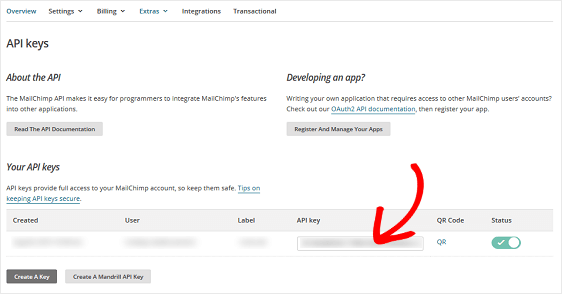
If you don’t have a MailChimp API key inside, click on Create Key to create a new one.
Back into your Marketing>WPforms window, add your API keys to the new connections dialog box.
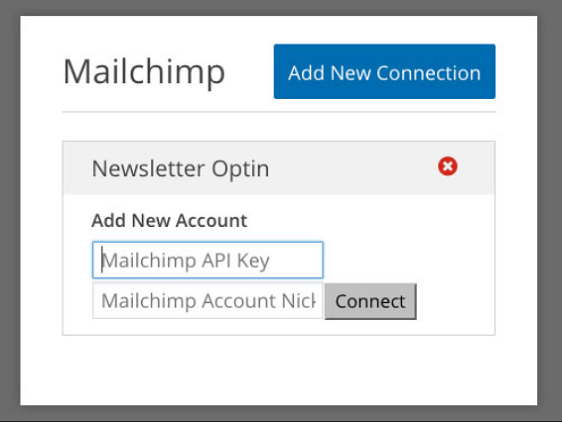
Click on Connect, and you are good to go.
Next:
- Choose an account inside MailChimp you want to connect with.
- Pick the right email list this new form fills should be attributed to
- Map your form fields to flow into your MailChimp account (optional) or enable conditional logic (if applicable)
If you have other fields on your WPForms (say you created a form with more fields than the basic ones such as Name and email, be sure to map those form fields with your MailChimp account as shown (this also includes conditional logic fields from your WPForms).

Be sure to check the box that says “Use Double opt-in” you want your leads to check and verify their email to be a part of your MailChimp list (or as leads).
No one needs tire kickers.
After you are done, click save.
WPForms do automatically unless you disable form notifications.
You can also send a notification to a member of your team by adding their email to the Send to the Email Address field.
Step 3: Set Up Subscription Confirmation Behavior
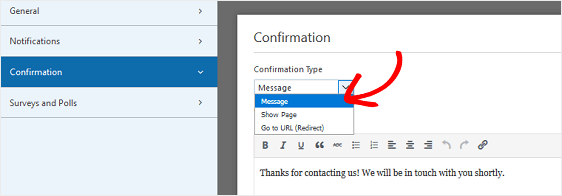
By default, WPForms will have three options made available to you to deliver a confirmation page or a confirmation action.
I recommend NOT to use the “message” confirmation since it’s a little too impersonal for my taste.
I’d rather want to optimize this part of the marketing workflow by showing subscribers a particular custom page (or a thank you page) built in a way that optimizes my marketing workflow, allows new subscribers to take some more actions, and to dwell on the thank you page longer.
Display Message: This confirmation type will display a simple message once a site visitor submits their form letting them know their form has been processed.
Show Specific Page: Take site visitors to a specific web page on your web page.
For help with this step, check out WPForms tutorial on redirecting site visitors to a thank you page, as well as this guide to creating effective Thank You pages
Go to URL (Redirect): Send site visitors to a different website after submitting the form.
Need more information on subscription form confirmations and redirects? See WPForms documentation on how to do just that.
Step 4: Add your MailChimp Form To Your Pages
Depending on your intent to use your new MailChimp form (WPForms connected to MailChimp), you can drop your form inside blog posts, pages, or maybe as a sidebar widget.
On WPForms, select the form you just created, click on “Add form” and insert your form anywhere inside WordPress.
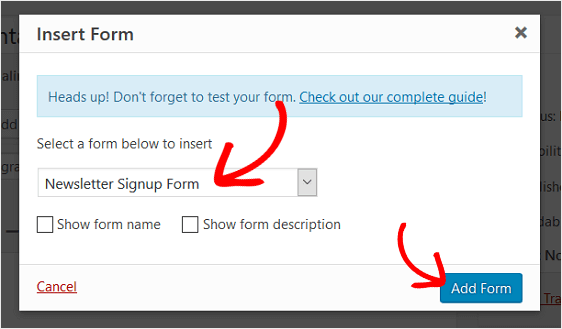
This is how it should show up like:
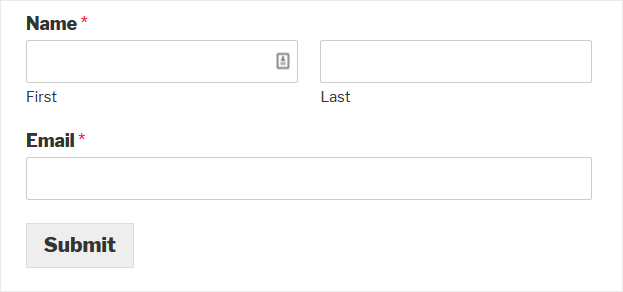
Now, when your potential customers or leads sign up using the form above, you’ll be able to push lead data or the form data to MailChimp (through WPForms).
Interested in creating other kinds of forms with WPForms?
See the possibilities below:
WordPress + Salesforce Integration: How WPForms Makes It Easy
How to Easily Add hCaptcha forms With WPForms
Collect Recurring Payments With WPForms + Stripe Integration
How to Accept Payments On WordPress
Tell me how your Mailchimp forms look like? Show off in the comments below.
