One of the most important aspects of any business is payment. How will customers pay you? You have to be able to accept their payments in order for them to do business with you. Learn how to create payment forms for authorize.net and WPForms below.
When it comes to accepting payments, there are a ton of options out there. The obvious big guns are Stripe and Paypal.
However, not everyone is able to use Stripe and Paypal (I know how long I had to wait for Stripe, and it’s not available to me officially).
In case you can’t use Stripe or if PayPal isn’t available in your country, you can use Authorize.net. All you need is an Authorize.net account and a WPForms account.
Authorize.net can help your business grow by enabling you to take credit cards and checks online and offline which increases your conversion rates, sales, and customer satisfaction.
Authorize.net boasts of more than 430,000+ merchants and you are in good hands.
This post walks through how easy it is to get started with Authorize.net so that you too can start receiving more payments from your customers.
With WPForms Authorize.Net Addon (available for the WPforms Elite License), you can easily create payment forms on WordPress that’ll help you accept payments from within your WordPress site itself. No code needed. No help required.
While using authorize.net is incredibly easy (along with advanced fraud detection features), with WPForms, your WordPress forms are mobile-friendly, easy-to-create (and manage), and you can also use conditional logic to do some very smart things with your WordPress forms.
You can also sell products and/or services with one-time or recurring payments (if you want to).
How cool is that, eh?
Here are the details on how to use Authorize.net with WordPress, thanks to the simplicity and power of WPForms
How to Connect Authorize.net To WordPress (& WPForms)
I assume that you already have an active Authorize.net account that you can use and sync with WPForms [Install and activate, if you haven’t done so].
Once you have WPForms installed, you’ll be able to navigate to “Addons” and activate the Authorize.net Addon inside WPForms.

If you already have an active Authorize.net, you’ll have to go through a one-time process to connect Authorize.net to WPforms.
Here’s a tutorial on how to activate Authorize.net.
How to Add Authorize.net as Payment Provider To Your WPForms
Once the Authorize.Net addon is active on your site, you’ll need to open WPForms » Settings in the left menu of your WordPress site. From there, click on the Payments tab.

Doing so will allow you to access this feature in the side menu.
Change the currency from the Currency dropdown before proceeding (if you’d like to change the currency).
For Authorize.net to work with WPforms, you’ll need the following details as form fields in your form:
Step 1: Create a new form or choose an existing one.
Step 2: Create at least four fields in your form:
- A Name field
- An Email field
- An items field (Single Item, Multiple Items, Checkbox Items, or Dropdown Items)
- An Authorize.Net field (which collects credit card details)
If you’d like to set up recurring payments with Authorize.net and WPForms, do this:
Note: Subscriptions will take a payment right away and then according to the schedule you specify in the “plans” you’ll create.
To create subscriptions, you’ll need to create the following:
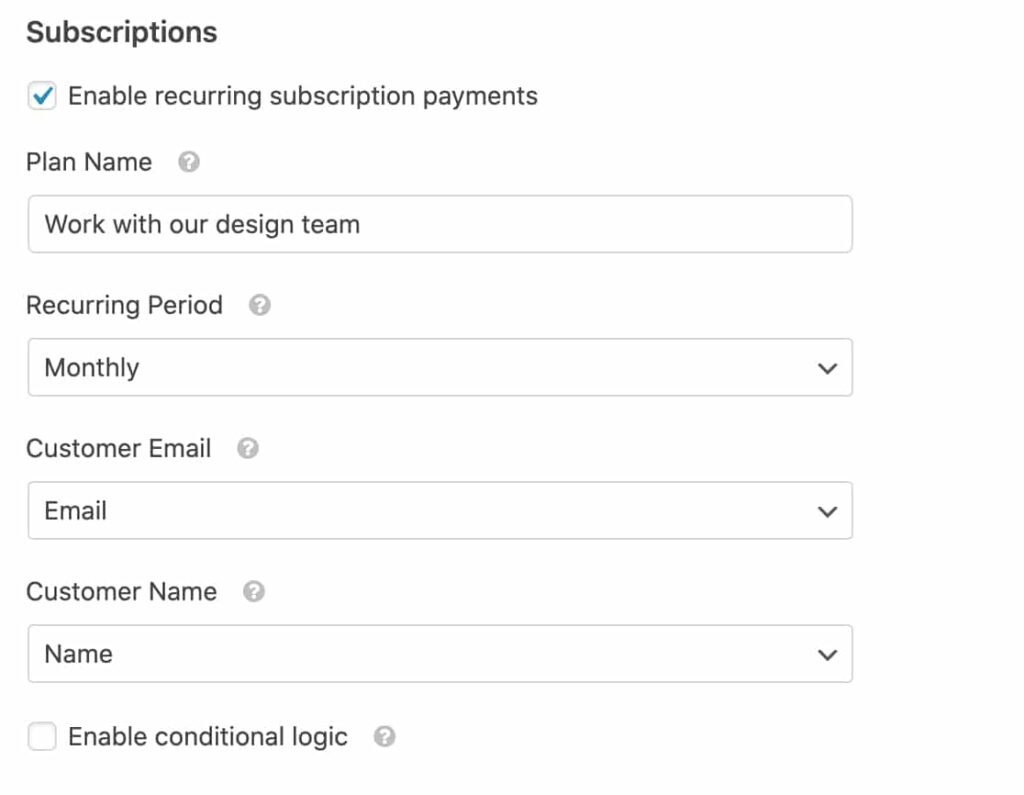
- Plan Name: Also appears in your customers’ credit card statement. This defaults to the name of the form if you leave it empty.
- Recurring Period: The period in which future payments are processed.
- Customer Email: Connects and syncs with the Email field from your form that this subscription relates to.
- Customer Name: The name of your customer.
How to Add Conditional Logic to WPForms
You could learn about how to create payment forms for Authorize.net all you want, but it’s at conditional logic that WPForms totally blows your mind. You can take that humble WordPress form and turn it into a smart little thing that allows you (and your customers a lot more flexibility).
Using conditional logic, you can do pretty much a lot of smart things (depending on what your forms do). Since we are on the topic of payments here (and related to Authorize.net), let’s have conditional logic play a part in how your customers choose to pay you (for your products or services).
Use case: Allow your customers a choice as to whether they should pay you a one-time fee or a subscription-fee.
Step 1:
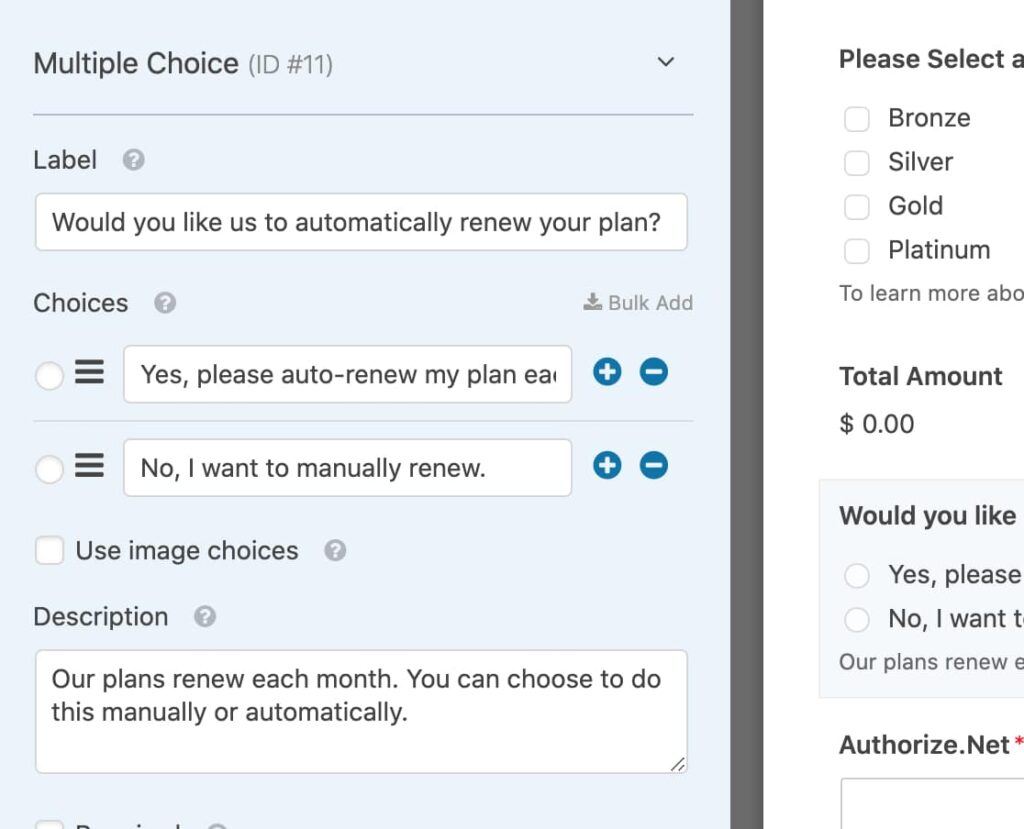
Create a drop-down or multiple-choice field in your form. Add relevant labels, descriptions, and provide other inputs (example shown below).
Step 2:
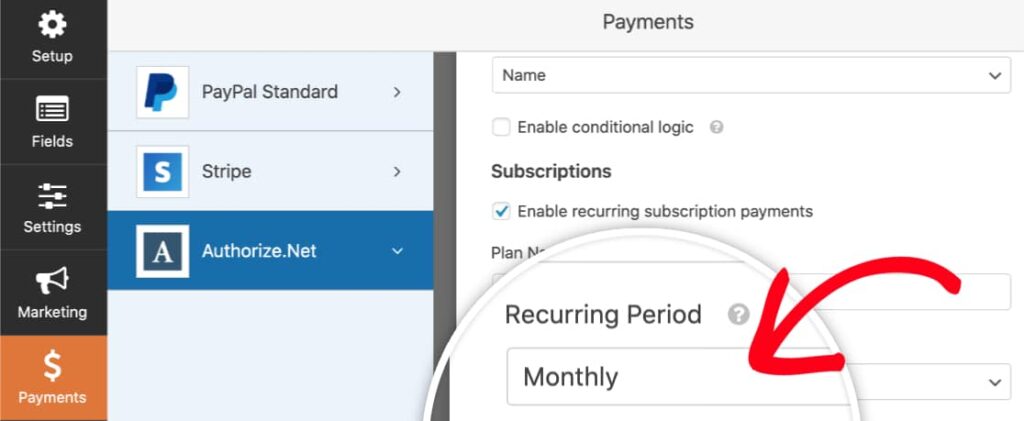
Go to Authorize.net settings, payment plans, and set recurring method to monthly payments
Step 3:
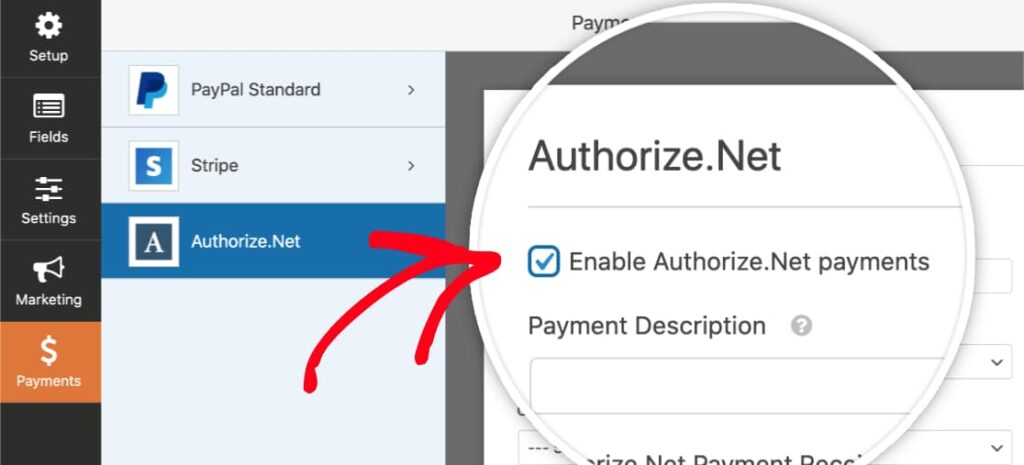
In your payments form, at the bottom, check the box labeled Enable conditional logic.
Step 4:
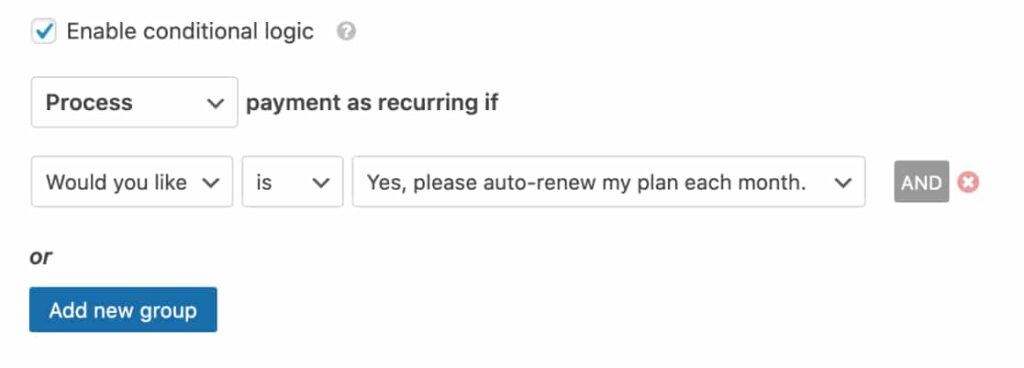
Set up conditional logic (depending on your form fields). Here’s an example WPForms provides:
Process payment as recurring if Would you like us to automatically renew your plan? is Yes, please auto-renew my plan each month..
Read more about the WPForms Authorize.net Addon and WPForms
Here’s a tutorial on how to Activate Authorize.net and use it with WPForms.
If you haven’t used WPForms before, I highly recommend you use it. Go here and get yourself an account (with the appropriate license).
Want to see what else WPForms can help you achieve? See this:
How to Create MailChimp Forms with WPForms
WordPress + Salesforce Integration: How WPForms Makes It Easy
How to Easily Add hCaptcha forms With WPForms
Collect Recurring Payments With WPForms + Stripe Integration
