ConvertKit just launched ConvertKit Creator Profile (beta) and it’s a terrific feature to use.
Here’s all about ConvertKit creator profile, how to create ConvertKit Creator profiles, and how to use it to your advantage.
Use ConvertKit Creator profile as your home to present who you are as a blogger, content creator, live streamer, or a business.
It can serve as a home for your newsletter or ConvertKit commerce products.
Or, it could be a home for all of your primarily links (and works much like Link-in-Bio tools, Shopify’s LinkPop or as one of those Linktree Alternatives).
Let’s Dig In:
How to Create and Use CovertKit Creator Profiles
Login To ConvertKit and Head to The “Grow” Tab
Get a ConvertKit account if you don’t have one.
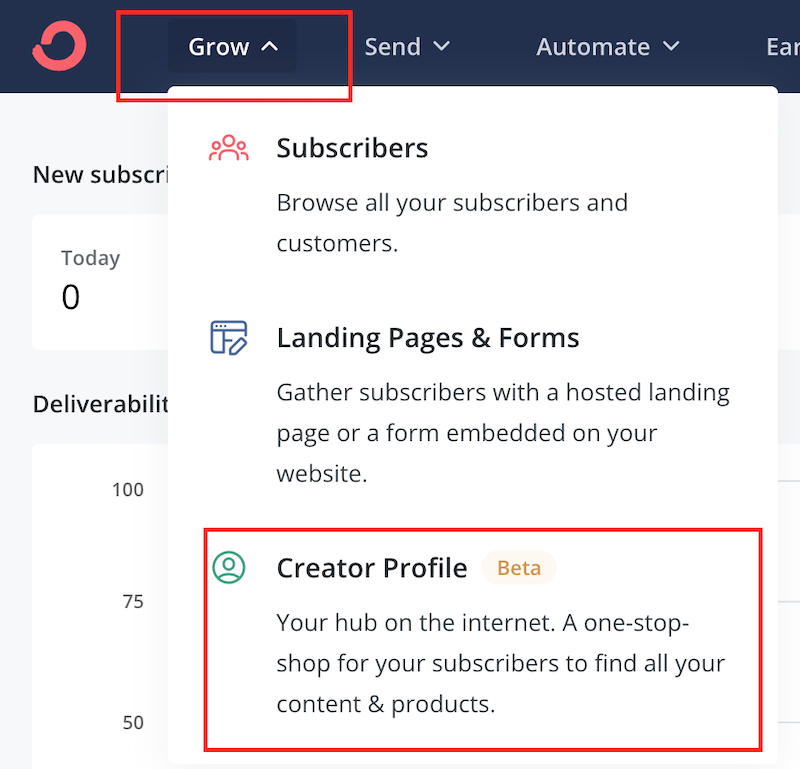
Login and click on “Grow” (top navigation menu). Select Creator Profile.
Design ConvertKit Creator Profile
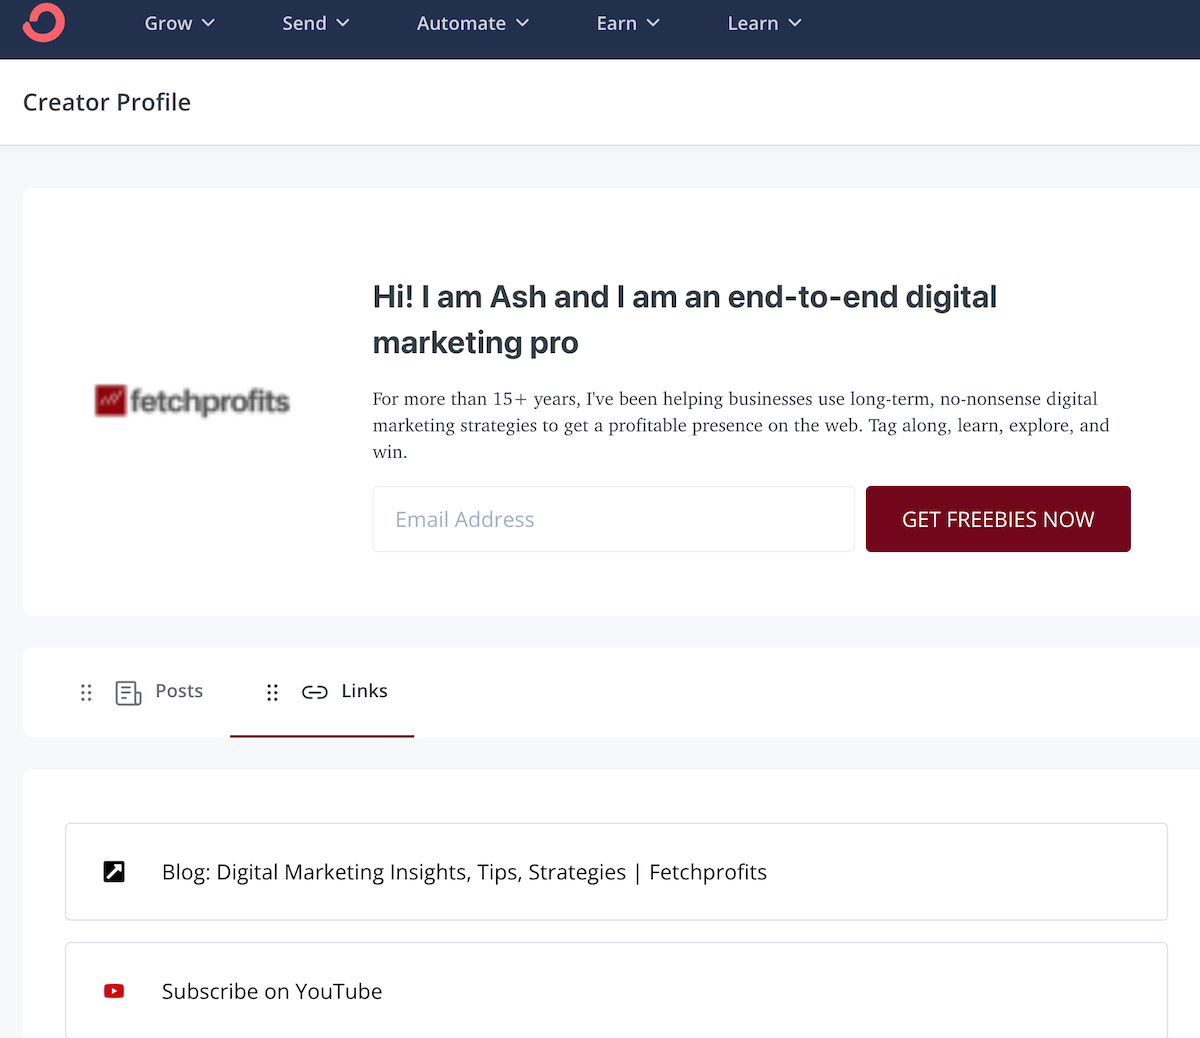
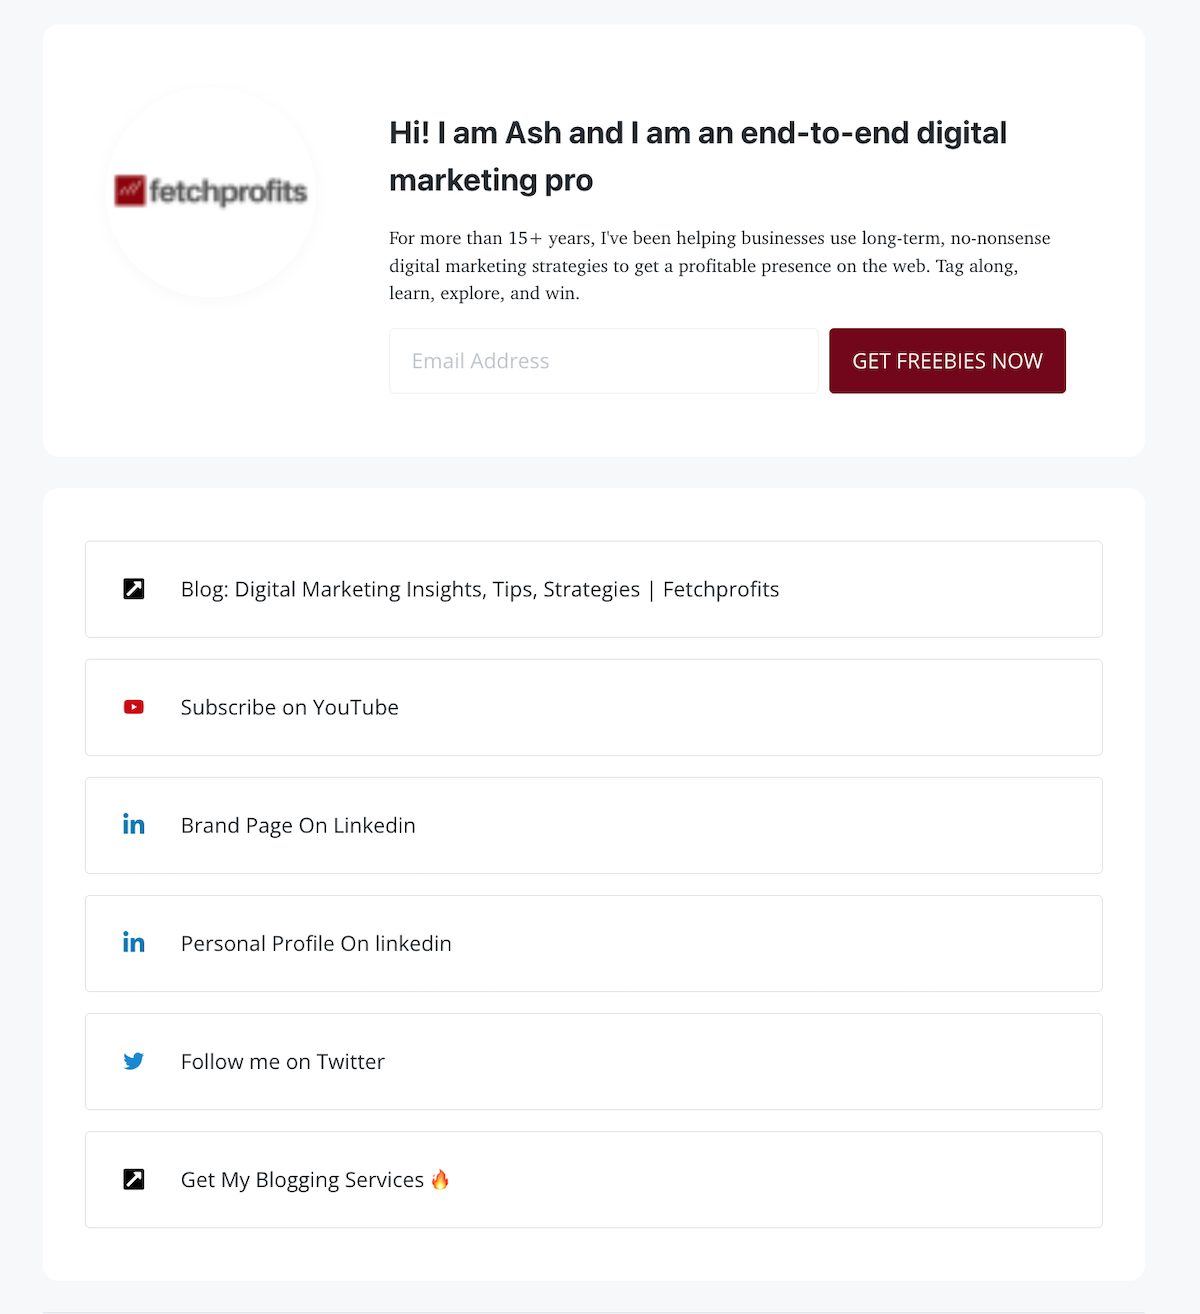
ConvertKit Creator profile has a straightforward design.
You can’t change the layout or the way it’s structured. Change the logo on the top right hand side of the page, if you are a business or if you’d like to project a brand (instead of a person). If you are an individual blogger or content creator, your own smashingly good photo is highly recommended.
Click on any element you’d like to change and a right hand side panel appears to allow you to make most changes (like changing colors, adding images, and to change fonts).
You have a headline and a subheading (right underneath). Write and tweak the copy until you are satisfied. Unfortunately, you can’t A/B test your headlines, copy, and other elements (not yet!).
There’s an opt-in box right underneath. You can change the color of the button by clicking on the button and working on button settings on the right hand side panel.
The ‘Posts’ and ‘Links’ Tabs
Underneath the top section, you’ll find two tabs: Posts and Links.
Posts: Newsletters are meant to be exclusive and valuable content you send out periodically to your subscribers. On the posts tab, your newsletter broadcasts are automatically shown here (available for anyone to read, and to get a taste for your newsletters and/or broadcast messages even before they sign up).
This is a way for others to sample your newsletters or broadcasts. Use it as such.
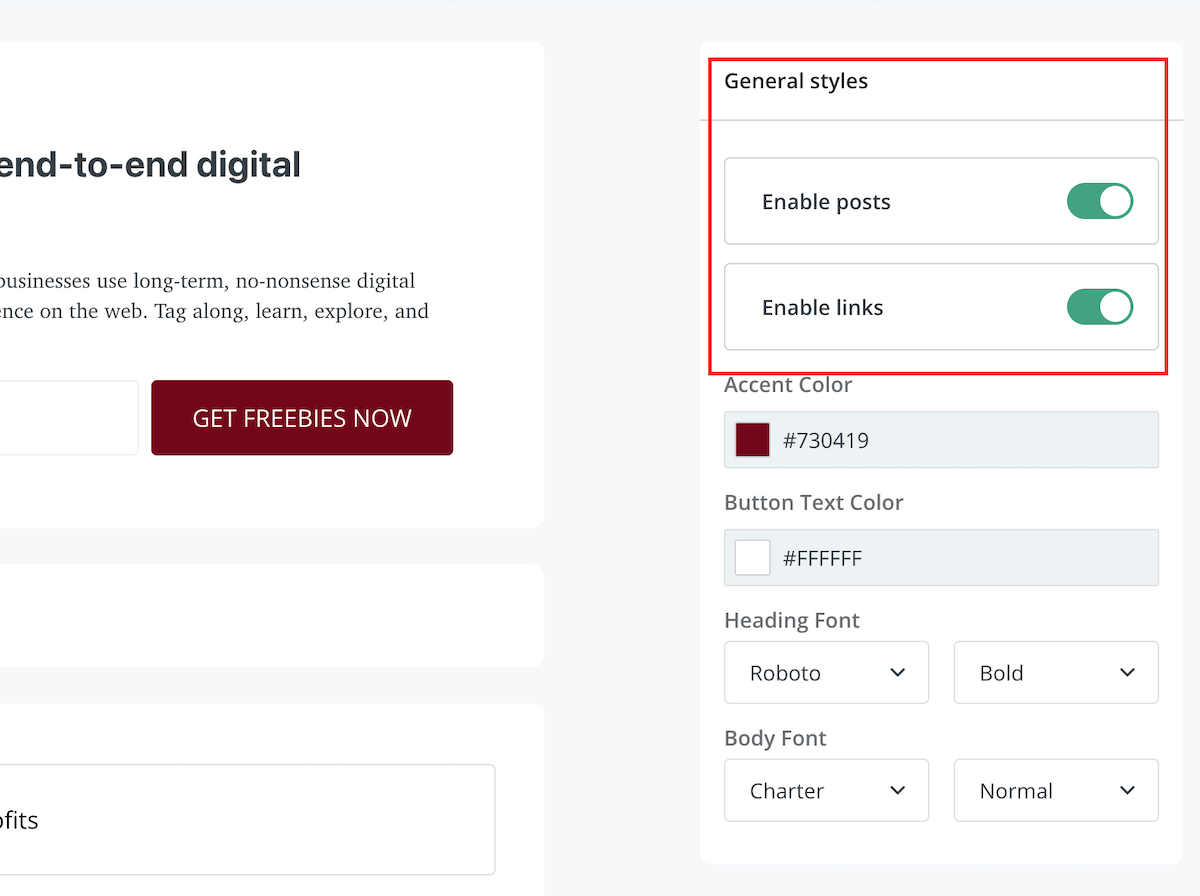
If you’d like to gate your content and allow only subscribers to view this content, use the toggle switch (on the right side panel) to disable the posts tab.
The same option is also available for your links on ConvertKit Creator Profile.
Using the links tab, you can add/delete and manage links. You have the option of showing (or not showing) primarily links by using the toggle button.
I recommend keeping the links tab enabled and showing your primarily links. When you do it, the ConvertKit creator profile page looks exactly like Link-In-Bio pages look.
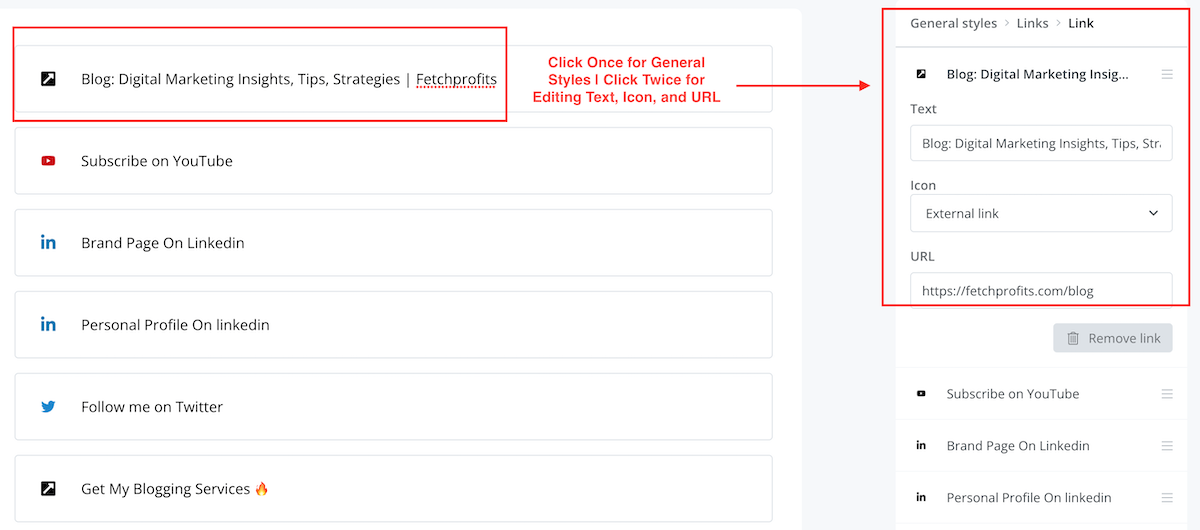
Edit Link Text [For Context]
To add a link, head to the “links” tab, and click on “Add Link”.
After you add a link, ConvertKit pulls up link text automatically.
You can edit how this link text is displayed (including styles, fonts, colors, borders for each link displayed, and more.
Feel free to add emojis, use your copywriting skills, and make them more contextual by clicking again and making changes to text, icons, and the URL itself.
Save and Publish (on Custom Domains)
Once you are satisfied how your ConvertKit Creator Page looks like, hit on save and publish. Click on settings to ensure that your creator profile is hosted and displayed using your ConvertKit custom domain.
So, the final destination of URL will be something like customdomain.yourdomain.com/profile
Note: Learn how to Add Custom Domains on ConvertKit. Also, learn how to add digital products on ConvertKit Commerce.
Watch the video
Read more:
ConvertKit Review (2023): Email Marketing, Made (Really) Easy
How to Sell Digital Products with ConvertKit
ConvertKit Upsells: Make Irresistible One-time Offers
GET ACCESS TO MY FREE, 1-PAGE BLOGGING STRATEGY PRIMER
- Weekly Newsletter
- eBooks, Checklists
- Courses, Discounts
Do you use ConvertKit? Have your Creator Profile up? [Show it to me, I’d love to see it].
Tell me all about it on Twitter, LinkedIn, or my LinkedIn Brand page.
